
Creating a markdown app with Electron and React
This post was also published in FreeCodeCamp: Here’s how I created a markdown app with Electron and React
This blog post is going to be a step-by-step tutorial on how to create a basic markdown application based on Electron and React.
I’ll describe why, how and what I used to create the markdown app which I call - Mook.
Source code for Mook can be found on github.
Motivation
There are a couple of reason why I started this project.
Recently, I’ve been seeing more and more impressive and interesting things that you can do with JavaScript, and I’ve wanted to do something with Electron for a while now.
JavaScript always felt weird for me to write and I’ve always tried to avoid it. Every time I tried to do something with JavaScript, I always felt like I was just hammering down on the keyboard until I got whatever it was to work.

However, I recently found myself looking more and more into JavaScript as it suddenly felt like a good tool to use for some of the problems I’ve been working on.
On another note (see what I did there?), whenever I use a note-taking application, I always feel like there’s some feature that’s missing, I can find that feature in another app but the other app will probably be missing a different feature that a third app might provide… And so I’m always on the lookout for finding new and better note taking apps.
With these thoughts in mind I decided to invest some time in learning JavaScript, and I decided to do so while building a markdown notes editor with Electron.
Requirements
Some of the requirements I thought about for the markdown app (actually there are many more, but this was my initial list):
- Editor and preview panes.
- Split screen between the editor and preview panes that can be dynamically moved.
- Support for code blocks and code language highlighting.
- Support for saving and syncing notes on GitHub.
- A hierarchy of notebooks and markdown notes.
- Support for Latex / math equations in the editor.
- Ability to group different notebooks with a shared topic.
- Ability to share some notebooks on GitHub and other notebooks on Dropbox, Google Docs, etc.
The stack
There were a couple of decisions I had to make for this project.
For example, should I use boilerplate? Should I use React, AngularJS, Riot, Vue, etc.? What kind of packages would I use? and so on.
In the end I’ve decided to avoid the boilerplate approach (at least for now), mainly because I wanted to build some of the foundations of the app myself and learn more in the process.
I decided to try building the app with React, probably just because I’ve heard a lot about it from friends and it seemed like what the cool kids are using these days.

Creating the environment for the app
Because we are going to use React, we’ll start by creating a basic React application and add Electron to it.
We’ll start our project using the create-react-app.
Preparing the environment
create-react-app is an easy way to create React applications with a basic configuration.
First, make sure that you have latest node and npm versions on your machine by running the following commands:
node -v
npm -v
yarn --version
As an example, at the time of writing, these are the versions on my machine:
node = v8.4.0
npm = 5.3.0
yarn = 1.0.1
Creating a React app with create-react-app
Install create-react-app as a global package with the following command:
npm install -g create-react-app
Create a new React app and cd into it:
create-react-app mook
cd mook
This is what our project should look like right now (I’ve excluded the “node_modules” folder from the view just so we could get a clear view of the project):
tree -I "node_modules"
.
├── README.md
├── package.json
├── public
│   ├── favicon.ico
│   ├── index.html
│   └── manifest.json
├── src
│   ├── App.css
│   ├── App.js
│   ├── App.test.js
│   ├── index.css
│   ├── index.js
│   ├── logo.svg
│   └── registerServiceWorker.js
└── yarn.lock

2 directories, 13 files
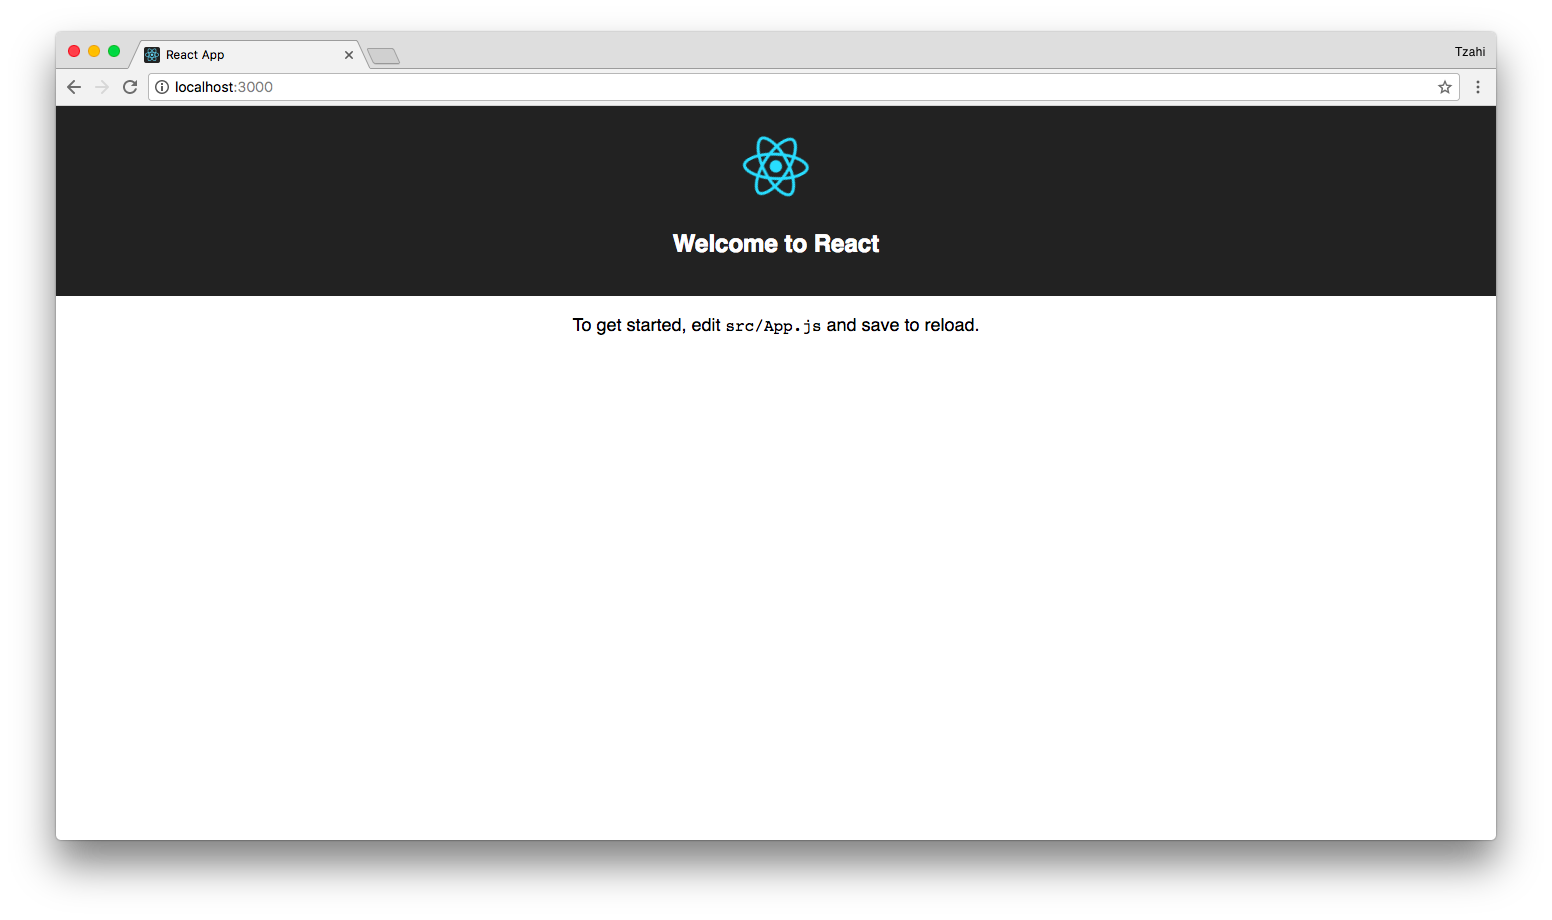
Now that we have a basic React app, let’s see what it looks like by running the start script that’s defined in the package.json file:
yarn run start
That should start a new browser window / tab with the following page:
Install Electron
Electron will allow us to build an application that will be able to run cross-platform.
Install the Electron package:
yarn add electron --dev
Open the package.json file. If everything’s OK, you should be able to see the Electron package in the devDependencies section of the file.
Update the package.json file with the following changes:
- Add the following line to the
scriptssection:
"electron-start": "electron ."
- Add a top-level “main” property and point it to the main Electron file (this file doesn’t exist yet but we will create it shortly):
"main": "public/main.js"
The package.json file should now look like this:
{
  "name": "mook",
  "version": "0.1.0",
  "main": "public/main.js",
  "private": true,
  "dependencies": {
    "react": "^15.6.1",
    "react-dom": "^15.6.1",
    "react-scripts": "1.0.13"
  },
  "scripts": {
    "start": "react-scripts start",
    "build": "react-scripts build",
    "test": "react-scripts test --env=jsdom",
    "eject": "react-scripts eject",
    "electron-start": "electron ."
  },
  "devDependencies": {
    "electron": "^1.7.6"
  }
}
Next, we’ll add some implementation of Electron’s events to control the application’s lifecycle. We will implement the following events:
- ready - Runs when Electron has finished initializing. In the code, this will run
createWindowwhich will create a browser window with React’s local urlhttp://localhost:3000, set the about panel and set themainWindowtonullonclose. - activate - Runs when the application is activated, so we’ll want to call the
createWindowfunction to… create a new window. - window-all-closed - Emitted when all windows have been closed. This will close the app on all platforms except Mac which will only close the window but will explicitly require to quit the program.
Add the following code to public/main.js:
const electron = require('electron');
const app = electron.app;
const BrowserWindow = electron.BrowserWindow;

let mainWindow;

function createWindow() {
  mainWindow = new BrowserWindow({width: 900, height: 680});
  mainWindow.loadURL('http://localhost:3000');

  app.setAboutPanelOptions({
    applicationName: "Mook",
    applicationVersion: "0.0.1",
  })

  mainWindow.on('closed', () => mainWindow = null);
}

app.on('ready', createWindow);

app.on('window-all-closed', () => {
  if (process.platform !== 'darwin') {
    app.quit();
  }
});

app.on('activate', () => {
  if (mainWindow === null) {
    createWindow();
  }
});
Make sure that React is still running in the background, if not, run it again with the command:
yarn run start
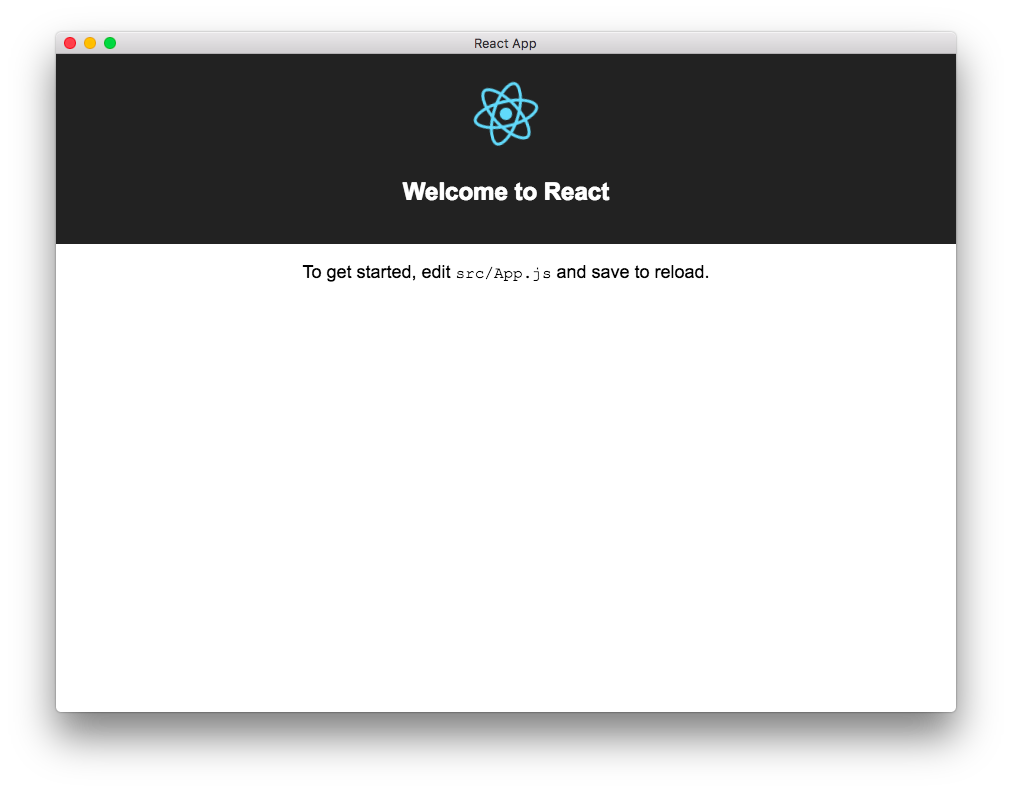
Open a new command line window in the project’s folder and run the following command:
yarn run electron-start
After you run the command, the following window will open:
If React is not running in the background, the Electron app would open with a blank white window.
Creating a stable development and build process
Now that we have a working template for our project with Electron and React, we need to make sure we have a stable build for development and distribution.
What we created until now is great for development but eventually we would want to create the distribution versions of the app for OS X, Windows and Linux.
I also didn’t like that we have to separately run the React server and Electron app in two different command line shells.
After doing some research on the topic, I found the following post From React to an Electron app ready for production by @thekitze which helped me a lot in this process.
We will need to add the following packages to our project:
- electron-builder - A complete solution to package and build a ready for distribution Electron app for macOS, Windows and Linux with “auto update” support out of the box. We will use this package to build our app for distribution.
- concurrently - Run commands concurrently. We will use this package to run React and Electron concurrently in one command.
- wait-on - Command line utility and Node.js API which will wait for files, ports, sockets, and http(s) resources to become available. We will use this package to wait for the React server to start running before starting the Electron app.
Run the following commands to add these packages to our app:
yarn add electron-builder wait-on concurrently --dev
Since these packages are only required for development, we will add the flag --dev to the yarn add command. This will also automatically add the packages to the devDependencies part of package.json.
Create a dev script
We want to create a development script to use while we’re developing the app. This will help us test new features that we developed in the application and also debug and make sure that we’re not breaking anything while we’re editing the code.
We’ll add a new script in the scripts section of our package.json file:
"electron-dev": "concurrently \"BROWSER=none yarn start\" \"wait-on http://localhost:3000 && electron .\""
There are a lot of things happening in this line so let’s break it down:

concurrently- runs the following commands at the same time.BROWSER=none yarn start- starts the react application and setsBROWSER=none. This means that the browser will not automatically open the React application.wait-on http://localhost:3000 && electron .- waits for the development server to start. Once it’s up it will start the Electron application.
Now, if you run the following from your command line you will only get a single Electron application window with the React logo.
yarn run electron-dev
Create a build script
Creating the build script is a bit easier. We need to add a couple of scripts to the scripts section in the package.json file:
- A script for building the React app before building the Electron app:
"preelectron-pack": "yarn build"
- A script for packaging the Electron app. This script builds the application package with
electron-builder.
"electron-pack": "build --em.main=build/electron.js"
Next, we will have to specify the build property, this is because of a minor conflict between create-react-app and electron-builder as both are using the build folder for two different purposes.
In order to solve this conflict, we need to manually configure electron-builder’s correct folders for the build step. Add the following build section to the package.json file:
"build": {
  "appId": "com.mook",
  "files": [
    "build/**/*",
    "node_modules/**/*"
  ],
  "directories": {
    "buildResources": "assets"
  }
}
We also need to add the homepage property to allow the packaged Electron app to find the JavaScript and CSS files:
"homepage": "./"
At this point, your pacakge.json file should look like this:
{
  "name": "mook",
  "version": "0.1.0",
  "main": "public/main.js",
  "homepage": "./",
  "private": true,
  "scripts": {
    "start": "react-scripts start",
    "build": "react-scripts build",
    "test": "react-scripts test --env=jsdom",
    "eject": "react-scripts eject",
    "electron-start": "electron .",
    "electron-dev": "concurrently \"BROWSER=none yarn start\" \"wait-on http://localhost:3000 && electron .\"",
    "electron-pack": "build --em.main=build/main.js",
    "preelectron-pack": "yarn build"
  },
  "dependencies": {
    "react": "^15.6.1",
    "react-dom": "^15.6.1",
    "react-scripts": "1.0.13",
    "electron-is-dev": "^0.3.0"
  },
  "devDependencies": {
    "concurrently": "^3.5.0",
    "electron": "^1.7.6",
    "electron-builder": "^19.27.7",
    "wait-on": "^2.0.2"
  },
  "build": {
    "appId": "com.mook",
    "files": [
      "build/**/*",
      "node_modules/**/*"
    ],
    "directories": {
      "buildResources": "assets"
    }
  }
}
The last step will be to update public/main.js. Until now, we’ve only supported the development version of the app. In production we won’t be able to use localhost:3000, instead we will serve the index.html file from the build folder.
First we need to install electron-is-dev, which will help us determine if Electron is running in development.
Install the electron-is-dev package:
yarn add electron-is-dev
Update public/main.js to use electron-is-dev:
- Add the package to the code:
const isDev = require('electron-is-dev');
const path = require('path');
- Change the
mainWindow.loadURLfunctionality in thecreateWindowfunction:
mainWindow.loadURL(isDev ? 'http://localhost:3000' : `file://${path.join(__dirname, '../build/index.html')}`);
The code basically check if we are in development mode, and if we are it will use localhost:3000, otherwise it will serve /build/index.html.
Your public/main.js file should now look like this:
const electron = require('electron');
const app = electron.app;
const BrowserWindow = electron.BrowserWindow;
const isDev = require('electron-is-dev');
const path = require('path');

let mainWindow;

function createWindow() {
  mainWindow = new BrowserWindow({width: 900, height: 680});
  mainWindow.loadURL(isDev ? 'http://localhost:3000' : `file://${path.join(__dirname, '../build/index.html')}`);

  app.setAboutPanelOptions({
    applicationName: "Mook",
    applicationVersion: "0.0.1",
  })

  mainWindow.on('closed', () => mainWindow = null);
}

app.on('ready', createWindow);

app.on('window-all-closed', () => {
  if (process.platform !== 'darwin') {
    app.quit();
  }
});

app.on('activate', () => {
  if (mainWindow === null) {
    createWindow();
  }
});
Now, let’s try to run the build script with the following command:
yarn run electron-pack
When the script run is complete you should see a new folder named dist in your project’s directory. You can find your packaged application in the folder named after your operating system. For example, mac users will be able to find the packaged application mook.app in the dist/mac folder.
When you run that file, you should get the same screen you get for the debug version:
Excellent, we’ve just finished the build infrastructure for our app!

Adding main functionalities
Now we’re able to start adding building blocks to our markdown app.
Creating a split pane screen
Let’s start by adding the split pane component, react-split-pane, to our application.
Install the react-split-pane package:
yarn add react-split-pane
Add the following JavaScript code to the src/App.js file:
- Import
react-split-pane:
import SplitPane from 'react-split-pane';
- Replace the render function with the following code. This code adds the
SplitPaneelement to the render function with two divs, one for the editor and one for the preview pane:
render() {
    return (
        <div className="App">
            <SplitPane split="vertical" defaultSize="50%">
                <div className="editor-pane">
                </div>
                <div className="view-pane">
                </div>
            </SplitPane>
        </div>
    );
}
We also need to add some css! Add the following code to src/App.css:
.Resizer {
    background: #000;
    opacity: .4;
    z-index: 1;
    -moz-box-sizing: border-box;
    -webkit-box-sizing: border-box;
    box-sizing: border-box;
    -moz-background-clip: padding;
    -webkit-background-clip: padding;
    background-clip: padding-box;
}

 .Resizer:hover {
    -webkit-transition: all 2s ease;
    transition: all 2s ease;
}

 .Resizer.horizontal {
    height: 11px;
    margin: -5px 0;
    border-top: 5px solid rgba(255, 255, 255, 0);
    border-bottom: 5px solid rgba(255, 255, 255, 0);
    cursor: row-resize;
    width: 100%;
}

.Resizer.horizontal:hover {
    border-top: 5px solid rgba(0, 0, 0, 0.5);
    border-bottom: 5px solid rgba(0, 0, 0, 0.5);
}

.Resizer.vertical {
    width: 11px;
    margin: 0 -5px;
    border-left: 5px solid rgba(255, 255, 255, 0);
    border-right: 5px solid rgba(255, 255, 255, 0);
    cursor: col-resize;
}

.Resizer.vertical:hover {
    border-left: 5px solid rgba(0, 0, 0, 0.5);
    border-right: 5px solid rgba(0, 0, 0, 0.5);
}
.Resizer.disabled {
  cursor: not-allowed;
}
.Resizer.disabled:hover {
  border-color: transparent;
}
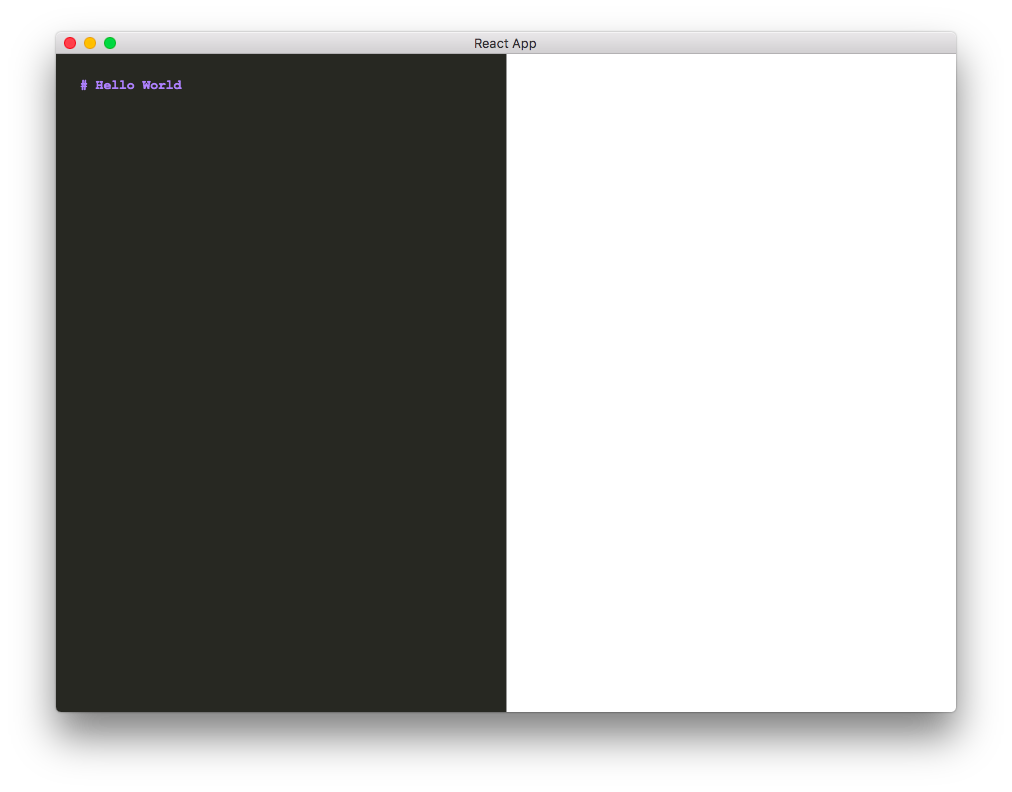
If you refresh the app or run it with the command yarn run electron-dev you should see the following screen which is currently just an empty page divided into two panes:
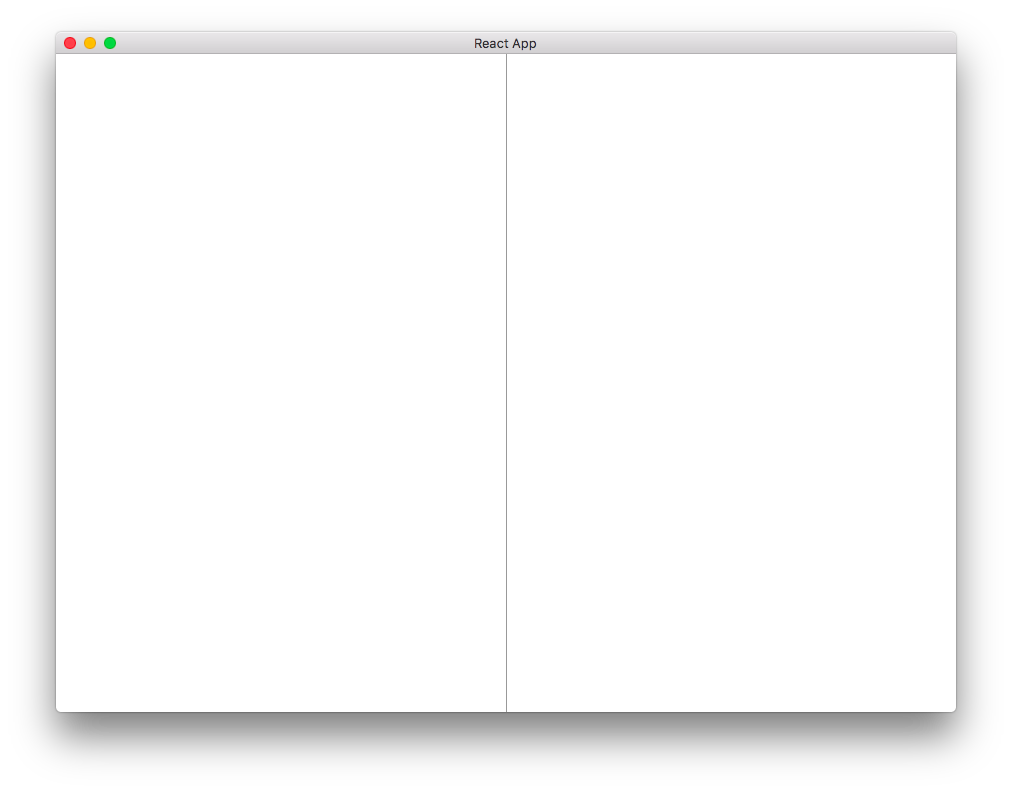
You can play around with the separator bar and see how it resizes the different panes.
Creating the editor and preview panes
Now that we have our split screen, we need to add functionalities for the editor and preview panes. We would want to set up the panes as they are usually set up in markdown editors, with the editor pane on the left and the preview pane on the right. We will write our markdown in the editor pane, and the preview pane will update every time we change something in the editor pane.
Creating the editor pane
Let’s start with the editor pane. For this we will use CodeMirror which is a JavaScript text editor.
Install the react package for code mirror React-CodeMirror. Because of a small issue of “Code mirror value doesn’t update with state change” in React-CodeMirror, we will install @skidding/react-codemirror which solves that issue:
yarn add @skidding/react-codemirror
Create a new file called src/editor.js with a new class called Editor that extends React’s Component class:
import React, { Component } from 'react';

class Editor extends Component {
}

export default Editor;
This class will basically wrap the react-codemirror package that is a React component for CodeMirror.
Next, we will import @skidding/react-codemirror and some css files that we would like to use for the CodeMirror component, syntax highlighting and markdown mode.
We will also add a render function that will return the CodeMirror element and add a constructor to the Editor class. This constructor will allow us to initialize the CodeMirror with a value from the main file.
We’ll set the CodeMirror component to markdown mode and the theme to monokai:
import React, { Component } from 'react';
import CodeMirror from '@skidding/react-codemirror';

require('codemirror/lib/codemirror.css');
require('codemirror/mode/javascript/javascript');
require('codemirror/mode/python/python');
require('codemirror/mode/xml/xml');
require('codemirror/mode/markdown/markdown');
require('codemirror/theme/monokai.css');

class Editor extends Component {
    constructor(props) {
        super(props);
    }

    render() {
        var options = {
          mode: 'markdown',
          theme: 'monokai',
        }
        return (
            <CodeMirror value={this.props.value}
                options={options} height="100%"/>
        );
    }
}

export default Editor;
In the src/App.js file we will import editor.js (add to the beginning of the file):
import Editor from './editor.js';
In the App class let’s add a constructor with an initial value for our editor:
constructor(props) {
  super();

  this.state = {
    markdownSrc: "# Hello World",
  }
}
In the render function of the App class, add the Editor component and set the value to markdownSrc:
render() {
    return (
      <div className="App">
        <SplitPane split="vertical" defaultSize="50%">
          <div className="editor-pane">
            <Editor className="editor" value={this.state.markdownSrc}/>
          </div>
          <div className="view-pane">
          </div>
        </SplitPane>
      </div>
    );
  }
The src/App.js file should look like this:
import React, { Component } from 'react';
import logo from './logo.svg';
import SplitPane from 'react-split-pane';
import Editor from './editor.js';

import './App.css';

class App extends Component {
  constructor(props) {
    super();

    this.state = {
      markdownSrc: "# Hello World",
    }
  }

  render() {
    return (
      <div className="App">
          <SplitPane split="vertical" defaultSize="50%">
              <div className="editor-pane">
                <Editor className="editor" value={this.state.markdownSrc}/>
              </div>
              <div className="view-pane">
              </div>
          </SplitPane>
      </div>
    );
  }
}

export default App;
Update the css file src/App.css with the following changes:
- Remove
text-align: center;in the.Appsection (at the top of the file) so the text is not aligned to center. - Add the following CSS that will stretch the editor to full height and add a little padding to the right side of the text:
.editor-pane {
  height: 100%;
}

.CodeMirror {
  height: 100%;
  padding-top: 20px;
  padding-left: 20px;
}

.ReactCodeMirror {
  height: 100%;
}
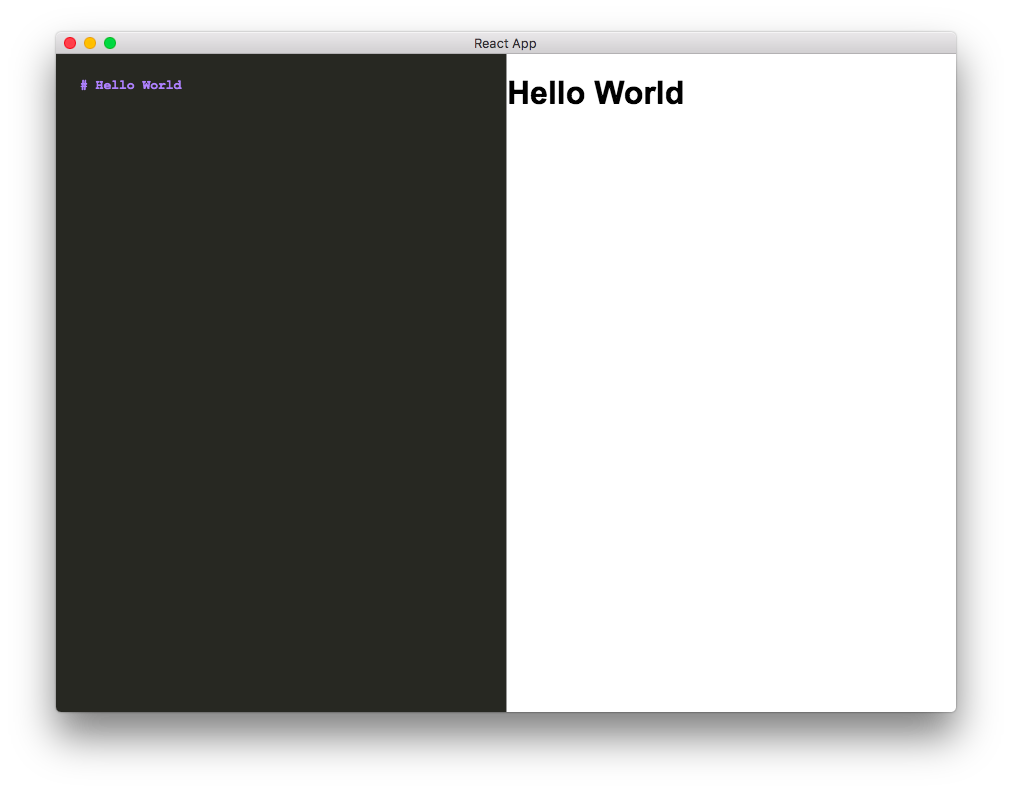
Refresh the app or run it with the command yarn run electron-dev, and you should see the following screen:
Creating the preview pane
We want the right pane to be a live preview of the editor that we created on the left pane.
In order to do that, we will use the React-Markdown package:
yarn add react-markdown
In the src\App.js file add the following import:
import ReactMarkdown from 'react-markdown';
Add the ReactMarkdown component inside the view-pane div:
<div className="view-pane">
  <ReactMarkdown className="result" source={this.state.markdownSrc} />
</div>
We set the source of the ReactMarkdown component to the same one as the editor this.state.markdownSrc.
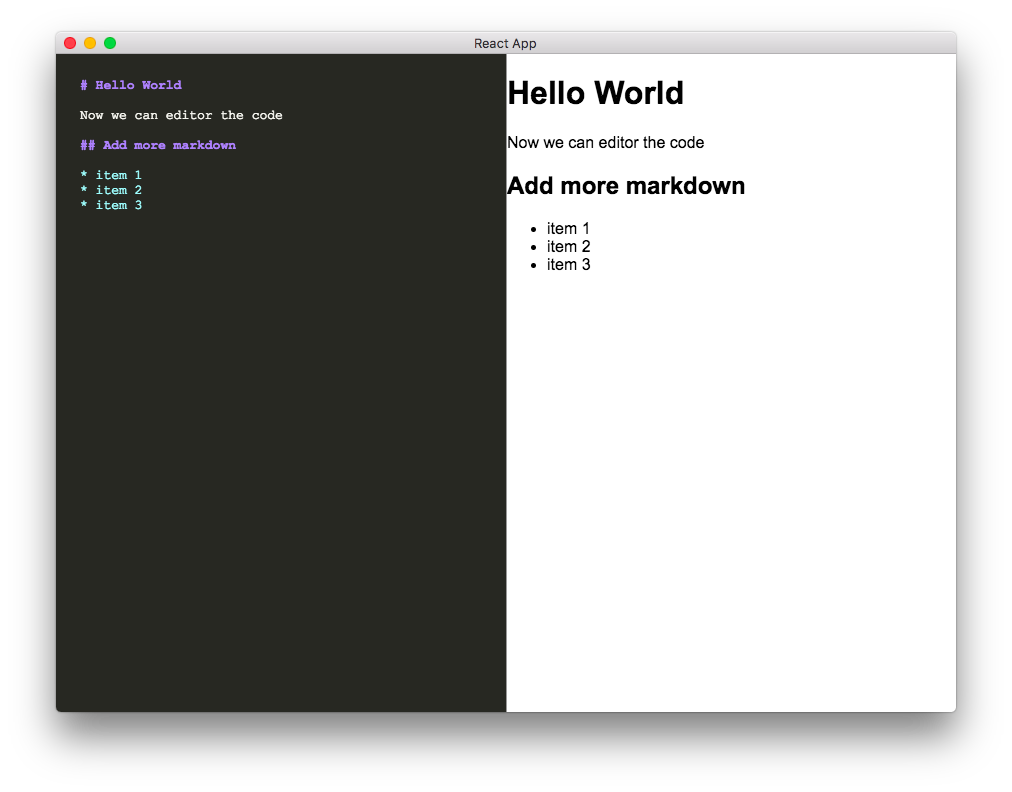
You can now run the yarn application and see the preview pane:
yarn run electron-dev
We can see the text in the preview pane, however, if we type something in the editor (left) pane it won’t transfer to the preview (right) pane.
What we’re going to do is make every change in the editor pass to the preview through the App class.
Adding the onMarkdownChange function to src\App.js will update markdownSrc with updated text from the editor.
This function will run on every change that happens in the editor.
Add the following code to src\App.js:
constructor(props) {
  super();

  this.state = {
    markdownSrc: "# Hello World"
  }

  this.onMarkdownChange = this.onMarkdownChange.bind(this);
}

onMarkdownChange(md) {
  this.setState({
    markdownSrc: md
  });
}
In the render function, add the following to the Editor element:
<Editor className="editor" value={this.state.markdownSrc} onChange={this.onMarkdownChange}/>
In the src/editor.js file, bind the onChange function of CodeMirror to the onChange of the parent:
constructor(props) {
  super(props);

  this.updateCode = this.updateCode.bind(this);
}

updateCode(e) {
  this.props.onChange(e);
}
In the render function, add the following to the CodeMirror element:
<CodeMirror
  value={this.props.value} onChange={this.updateCode}
  options={options} height="100%"
/>
The src/App.js file should look like:
import React, { Component } from 'react';
import logo from './logo.svg';
import SplitPane from 'react-split-pane';
import Editor from './editor.js';
import ReactMarkdown from 'react-markdown';

import './App.css';

class App extends Component {
  constructor(props) {
    super();

    this.state = {
      markdownSrc: "# Hello World"
    }

    this.onMarkdownChange = this.onMarkdownChange.bind(this);
  }

  onMarkdownChange(md) {
    this.setState({
      markdownSrc: md
    });
  }

  render() {
    return (
      <div className="App">
          <SplitPane split="vertical" defaultSize="50%">
              <div className="editor-pane">
                <Editor className="editor" value={this.state.markdownSrc} onChange={this.onMarkdownChange}/>
              </div>
              <div className="view-pane">
                <ReactMarkdown className="result" source={this.state.markdownSrc} />
              </div>
          </SplitPane>
      </div>
    );
  }
}

export default App;
The src/editor.js file should look like:
import React, { Component } from 'react';
import CodeMirror from '@skidding/react-codemirror';

require('codemirror/lib/codemirror.css');
require('codemirror/mode/javascript/javascript');
require('codemirror/mode/python/python');
require('codemirror/mode/xml/xml');
require('codemirror/mode/markdown/markdown');
require('codemirror/theme/monokai.css');

class Editor extends Component {
    constructor(props) {
        super(props);

        this.updateCode = this.updateCode.bind(this);
    }

    updateCode(e) {
        this.props.onChange(e);
    }

    render() {
        var options = {
          mode: 'markdown',
          theme: 'monokai',
        }
        return (
            <CodeMirror value={this.props.value} onChange={this.updateCode} options={options} height="100%"/>
        );
    }
}

export default Editor;
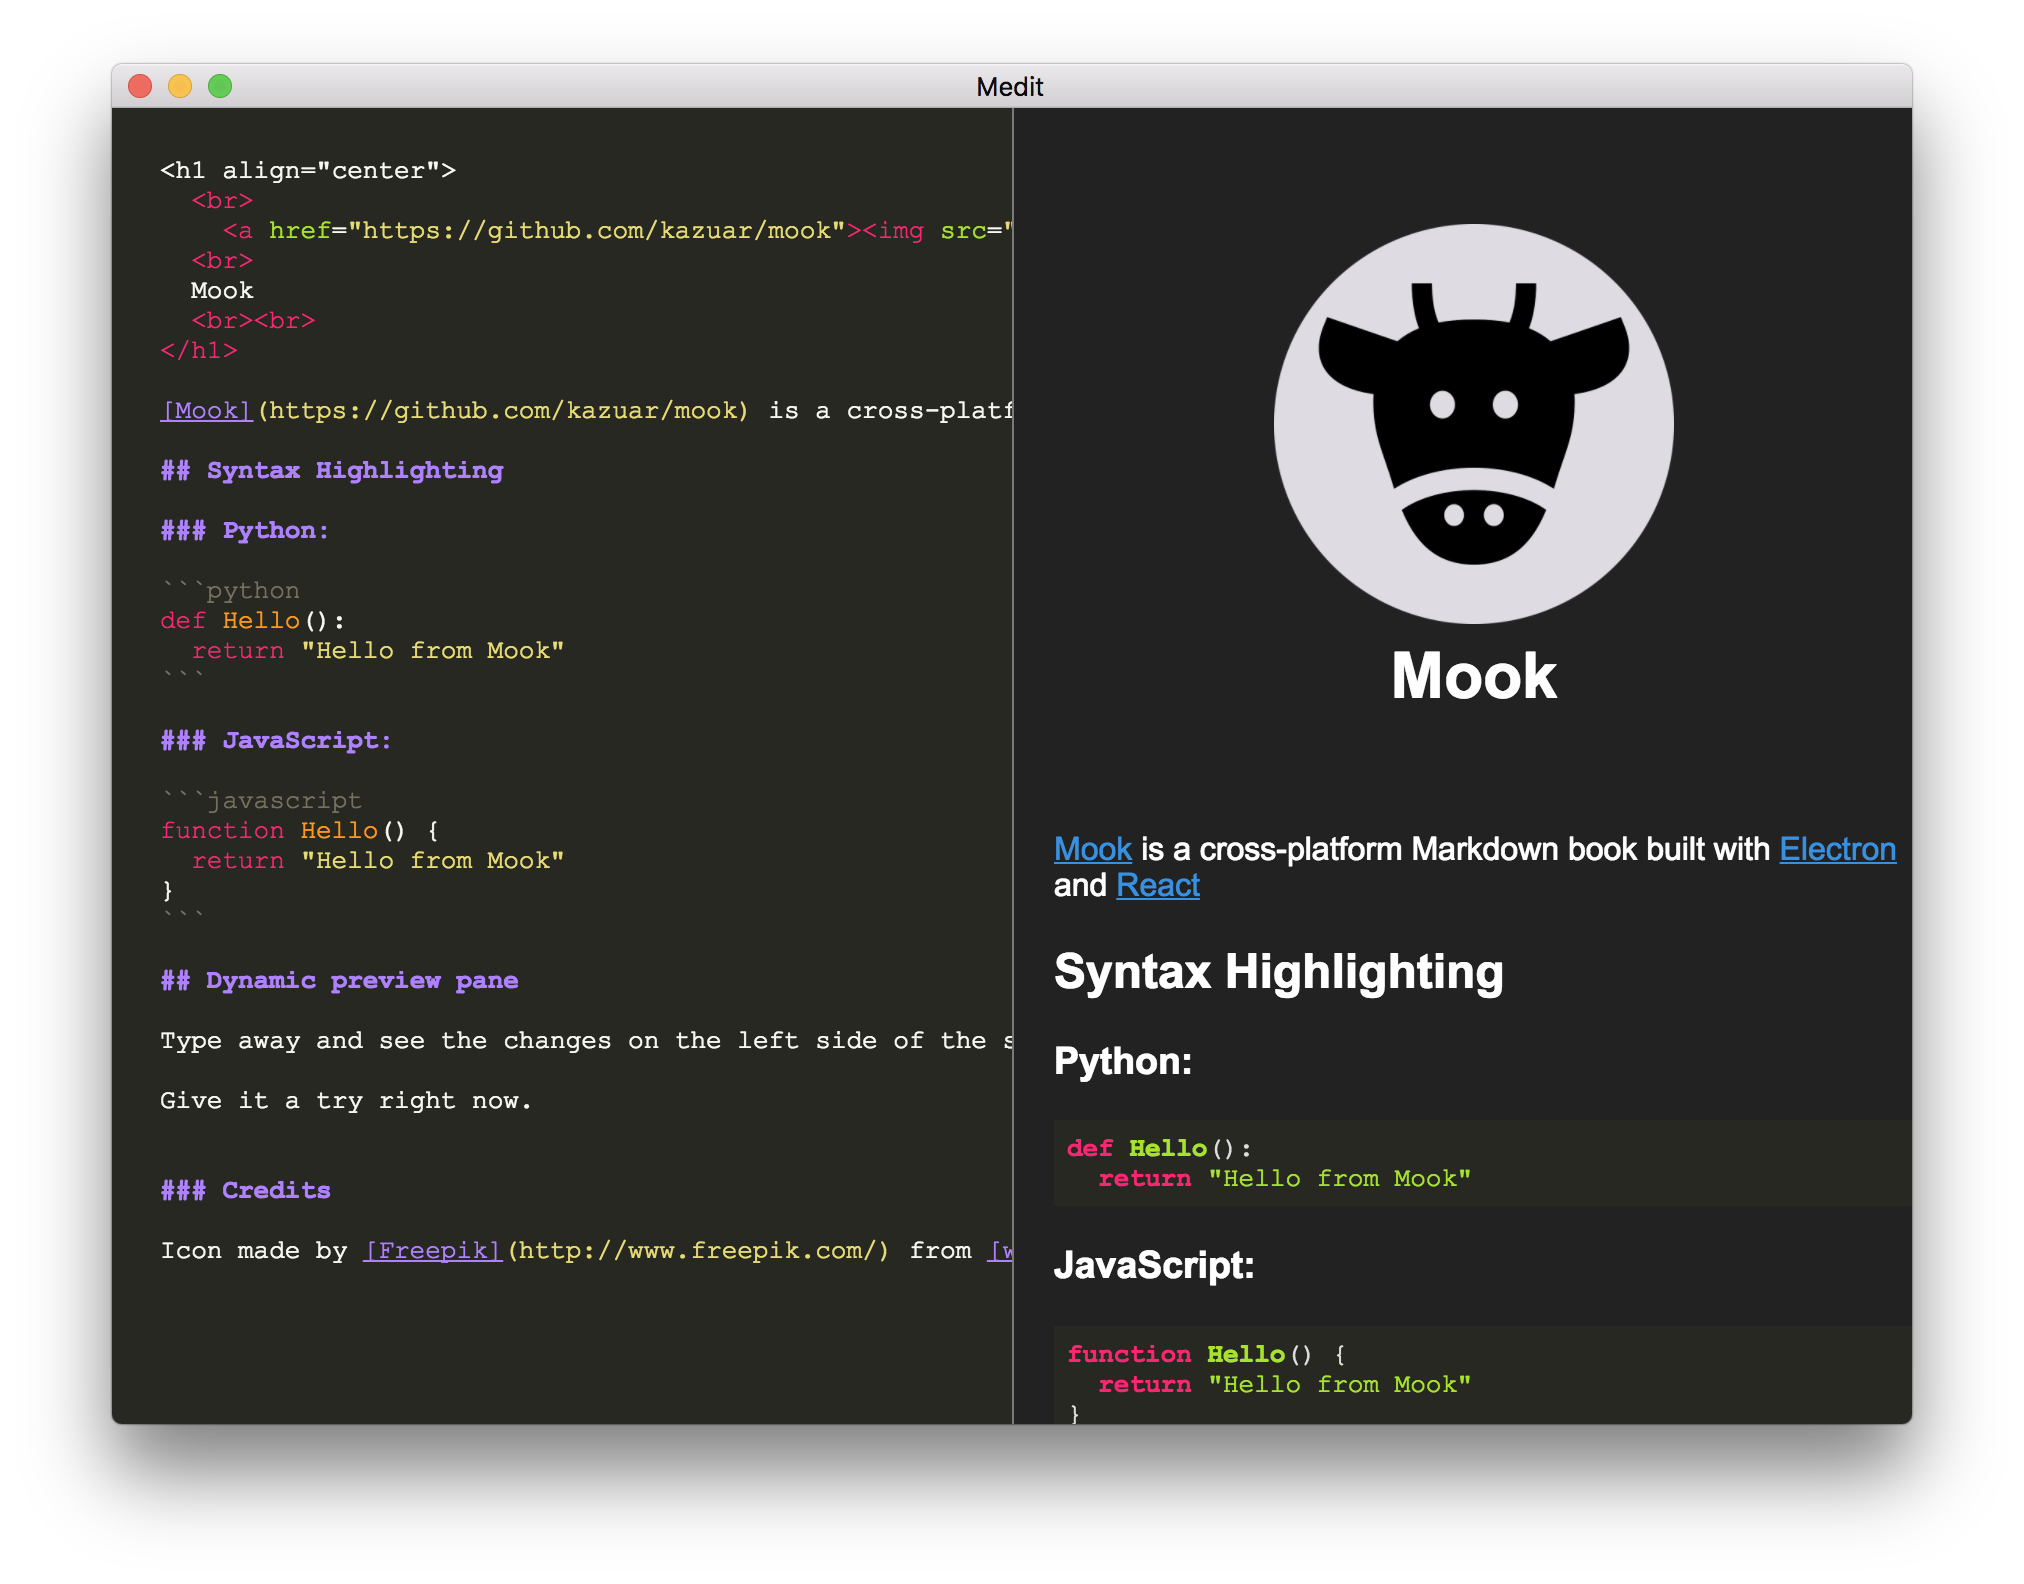
When you reload the application, you should be able to update the editor on the left with text and see the changes on the preview pane on the right.
Full source code can be found on github.
What’s next?
There are a lot of things that we still need to accomplish here:
- Save and open files
- Auto save while editing
- Toolbar / control over the panes layout
- Backuptnotes on Github / Dropbox / etc.
- Support saving notes in groups or unified in a “notebook”
- Support math equations in the Markdown
- More amazing features!
I guess that’s what we’ll be doing next time…

Follow me on Twitter @kazuarous for updates about progress, upcoming features or for any other reason.
Contributions
You can contribute in any way you want. Any help is appreciated. Don’t hesitate to share your suggestions or any comment that you might have.
Also, if you would like to see a specific feature that you think is important for you, feel free to ask for them in the comments or just open a issue on github.