
Did I leave the oven on? (with OpenCV and Python)
“Did I leave the oven on?”

This question will sometimes pop up at the most inconvenient times.
Sometimes when you just left your house.
Sometimes on your way to work.
Sometimes on a plane while you’re on your way for a long vacation…
There are different solutions for this problem:
- The rubber band method
- Saying / singing it out loud (like Samuel L. Jackson)
- Labeling your appliances or even making a checklist that includes the oven before leaving the house to a long vacation.
Or, we can do something better…
In this tutorial we’ll try the technical approach to the problem.
Full code can be found on Github.
Problem definition
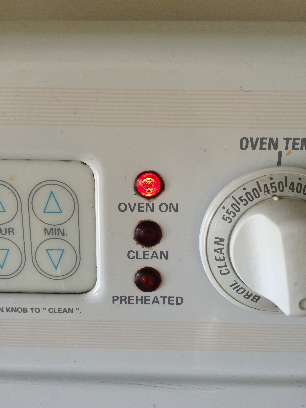
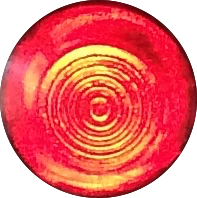
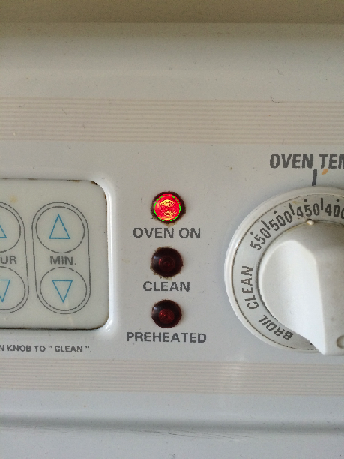
In our case, we need to decide on the signal that we’ll use in order to determine if the oven is on / off. In my kitchen, that signal is a red light on top of the text “OVEN ON”.
When the red light is on, the oven is on:
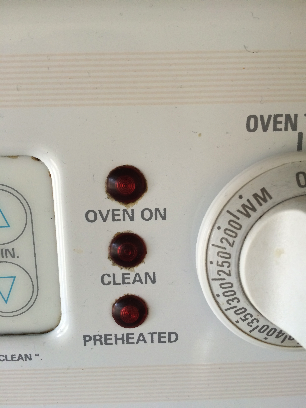
When the red light is off, the oven is off:
Prerequisites
Make sure that on your machine you have the following:
- OpenCV 3.0
- Python 2.7
- Numpy 1.9
Installing OpenCV 3.0 + Python 2.7
If you don’t have OpenCV installed on your machine, start by following Adrian Rosebrock’s excellent tutorial on installing OpenCV 3.0 and Python 2.7+ on OS X. I’ve added my own notes about the installation process, in case you run into some issues in compiling OpenCV 3.0 on OS X.
Process
Based on the fact you were successfull in installing OpenCV on your environment, we will start the process of analyzing our data in order to determine if the oven is ON / OFF.
Load the required packages
- argparse - for argument handling.
- numpy - a highly optimized library for numerical operations. OpenCV uses numpy for its array structures.
- cv2 - OpenCV for processing images.
import argparse
import numpy as np
import cv2
Loading the image
image = cv2.imread(image_path)Reducing noise in the image
We will want to smooth the input image in order to reduce the noise in the image. This will make it easier to detect objects in the image. For medianBlur we will use aperture size of 3. A higher value means that the image will be more blurry.
blur_image = cv2.medianBlur(image, 3)Convert the image colors to HSV
HSV - Hue, Saturation and Value (brightness). HSV will allow us to extract a colored object since it is easier to represent a color in HSV than in BGR.
Converting the image to HSV will allow us to identify a color in the image using the hue value (a single value instead of three).
This is how it’s done:
hsv_image = cv2.cvtColor(blur_image, cv2.COLOR_BGR2HSV)The code will result in the following image:
Detecting color in the image
In order to decide on the color that we want to detect, we can look at the histogram of the color values in the image of the oven light.
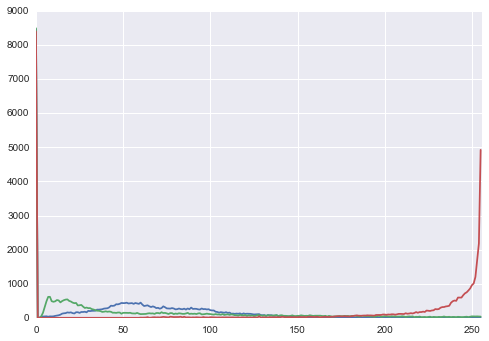
We can see that the color red is dominant in the image. There are two peaks of red color - one in the low range and one in the high range. These color values are translated to hue in the range of 0 to 10 and 160 to 180 (for the color red).
For each hue range we will create a mask on the HSV image and remove everything that isn’t in the selected range of the required color.
def create_hue_mask(image, lower_color, upper_color):
lower = np.array(lower_color, np.uint8)
upper = np.array(upper_color, np.uint8)
# Create a mask from the colors
mask = cv2.inRange(image, lower, upper)
output_image = cv2.bitwise_and(image, image, mask = mask)
return output_image
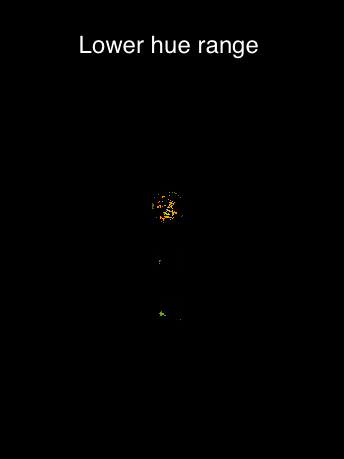
# Get lower red hue
lower_red_hue = create_hue_mask(hsv_image, [0, 100, 100], [10, 255, 255])
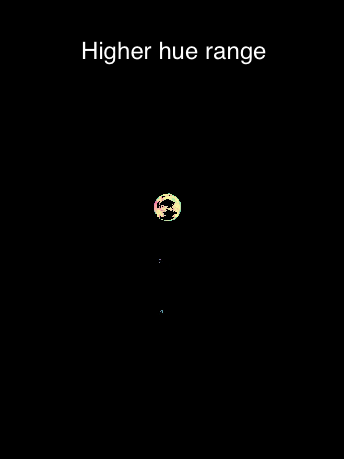
# Get higher red hue
higher_red_hue = create_hue_mask(hsv_image, [160, 100, 100], [179, 255, 255])With the following results:
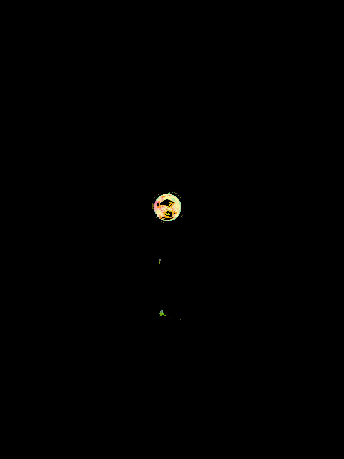
Next step is to merge these images together in order to catch all of the red hues:
full_image = cv2.addWeighted(lower_red_hue, 1.0, higher_red_hue, 1.0, 0.0)Which will have the following result:
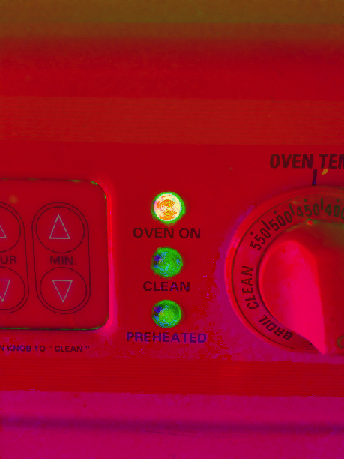
Find circles in the image
Now we have a picture with only the red hues in it, and we will want to identify whether the light is on (there is a circle of red hues) or the light is off (there is no circle). We need to find the circles in the new image, but first we will need to convert the image to grayscale (since the input for HoughCircles is a grayscale image).
For detecting the circles in the image we will use the following parameters (from OpenCV HoughCircles):
- Grayscale input image
- HOUGH_GRADIENT is the circle detection method (currently the only one).
- Inverse ratio of the accumulator resolution to the image resolution. In this case, 1.2.
- Minimum distance between the centers of the detected circles. In this case, 100.
# Convert image to grayscale
image_gray = cv2.cvtColor(full_image, cv2.COLOR_BGR2GRAY)

# Find circles in the image
circles = cv2.HoughCircles(image_gray, cv2.HOUGH_GRADIENT, 1.2, 100)
Results
At this point it will be enough to check if there are any circles.
If there are, it means that we have a signal that at least one of the oven lights is on.
If we couldn’t find any circles it means that none of the lights are on and the oven is off.
To prove that, we can draw the circles on the original image with the following code:
# Draw the circles on the original image
circles = np.round(circles[0, :]).astype("int")
for (center_x, center_y, radius) in circles:
    cv2.circle(image, (center_x, center_y), radius, (0, 255, 0), 4)
The result will be:
Next steps
There are many things that we can do from here, some examples are:
- Detect the specific light that is on and by that understanding the exact status of the oven.
- Create a service that will allow us to check the status of the oven remotely.
- Add this functionality to raspberry pi so we can have a small device that will alert us if the oven is off or on.
Full code sample can be found on Github.